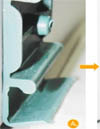
Clips are self aligning and should sit squarely on floor before fastening.
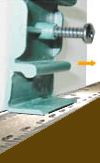
Fasten clips to wall spacing them between 12 -16" apart.
Clips may be fastened to vertical wall studs where practical.
Attach clip to contact floor plate.
Tighten clip to prevent movement. DO NOT OVER-TIGHTEN. Self tapping screws or nails may be used, based on application.
Joints can be mitered as with regular mouldings. Do not drive nails through face of moulding. This may damage surface. Remember, this is a finished product, care should be taken when handling and installing prefinished mouldings.
TOOLS:
Screw guns may be used but be careful not to over-tighten or you may deform clips.
A fine tooth blade and a fine tooth back-saw works well.
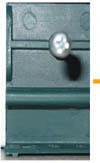
Moulding is easily pushed onto clips by slapping with palm of hand.
Wear a mask to prevent breathing in dust while cutting moulding.
A very soft rubber mallet with very light pressure will aid in attaching moulding.
For a very tight clip, apply soap to help moulding snap on.
IMPORTANT:
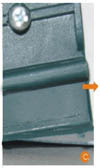
CLIPS MUST BE INSTALLED, LEVEL WITH, AND AT RIGHT ANGLE (90°)TO FLOOR. KEEP CLIPS STRAIGHT ALONG TOP AND BOTTOM. LEAVE A GAP (APPROXIMATELY THE THICKNESS OF A STEEL STRAIGHT EDGE) BETWEEN THE CLIP AND FLOOR OR CEILING.
THIS WILL MAKE FOR QUICKER AND EASIER ATTACHMENT OF MOULDINGS TO CLIPS.
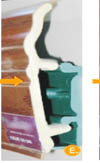
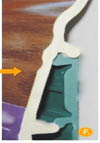
Clip Pushed Too Far
Into Space At Floor
And Wall
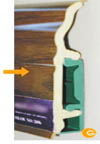
Correct Clip Position In
Relation To Floor And Wall